
Westminster Wood Flooring installs engineered hardwood flooring in Westminster, CA, serving surrounding cities including Midway City, Garden Grove, Stanton, Fountain Valley and Huntington Beach. For 20+ years we have laid engineered floors over concrete slabs in houses and ground-floor condos, and over the plywood of upstairs rooms, choosing the product and the installation method to suit what is actually underneath.
Engineered hardwood is a real wood surface bonded to a layered core. That core is what makes it the stronger choice over concrete, where solid boards are more likely to cup as the slab gives off moisture. It is also what decides how the floor behaves years from now, so we talk about wear layer thickness and core construction before we talk about color.
Every engineered install starts with moisture testing of the slab or subfloor, with the readings written down, and a look at whatever flooring and adhesive is already there. You get a written, itemized estimate that separates material, removal, slab preparation, underlayment and trim, and a schedule for when the finished floor can take furniture.
How Engineered Hardwood Is Built
The Wear Layer on Top
The wear layer is the slice of real hardwood you see and walk on, and its thickness is the single most important number on the box. It decides how many times the floor can be sanded and refinished, which in turn decides how long the floor can last before replacement. A thin layer suits a floor you expect to replace in a decade or so; a thicker one can be sanded to bare wood more than once, much like solid hardwood. We put the specification of each product in writing so you can weigh price against lifespan.
Core Construction and Stability
Beneath the wear layer, most engineered floors use a multi-ply core of thin wood layers laid in alternating directions. Each layer resists the others’ movement, which is why the board stays flatter than solid wood when humidity changes. Some products use a high-density fiber core or a combination core instead, with different strengths in dent resistance and moisture tolerance. We explain the construction of each option and match it to the room, the subfloor and how the household uses the space.
Formaldehyde Limits and Product Labels
Engineered flooring is a composite wood product, and the adhesives in its core are regulated. California’s formaldehyde limits in 17 CCR 93120.2 and the federal standards under TSCA Title VI both apply, and compliant products carry a CARB Phase 2 or TSCA Title VI label. We check that labeling before ordering and keep the documentation with your paperwork, which matters most for a family spending a lot of time on and near the new floor.
Species, Plank Width and Factory Finish
Because the wear layer is a thin slice rather than a whole board, engineered flooring is where wide plank white oak, hickory and walnut become practical over concrete. Wider planks show more grain and fewer seams, and the stable core keeps them from cupping the way a wide solid board would. Most engineered floors arrive with a factory finish cured under ultraviolet light, which is harder than most site-applied coatings and means the room is usable as soon as the last board and trim are in. We bring samples in the actual widths and finishes so you can see them against your walls and light.
Engineered Wood Over a Concrete Slab
Testing the Slab Before Ordering
A slab can look and feel dry while still giving off moisture that will cup, gap or debond a new floor. We test with the ASTM F2170 in-situ relative humidity method, which reads the moisture inside the concrete, or with a calcium chloride test on the surface, and compare the result with the flooring manufacturer’s published limit. If the slab reads too high, a moisture-control adhesive, a vapor retarder or a different product goes into the plan before anything is ordered.
Removing Old Flooring and Adhesive
A slab being prepared for a new floor often still carries old glue-down flooring, carpet tack strip or tile, and the adhesive left behind will not hold a new floor reliably. We take the old layers up, grind or scrape the adhesive down to clean concrete and test the slab again once it is exposed. Black mastic and old 9x9 tile are treated as a possible asbestos question and tested before anyone grinds or scrapes them, because SCAQMD Rule 1403 governs how that material is handled.
Flattening, Patching and Vapor Control
Engineered flooring needs a flat substrate, and a slab with humps, dips or old patch lines will telegraph through the new boards and leave hollow spots. We grind the high points, fill the low ones with a cement-based patch and check the surface with a straightedge before installation. Where the moisture reading calls for it, a vapor retarder membrane or a moisture-blocking adhesive goes down as part of the same preparation.
Glue-Down, Floating and Upstairs Installations
Glue-Down Engineered Floors
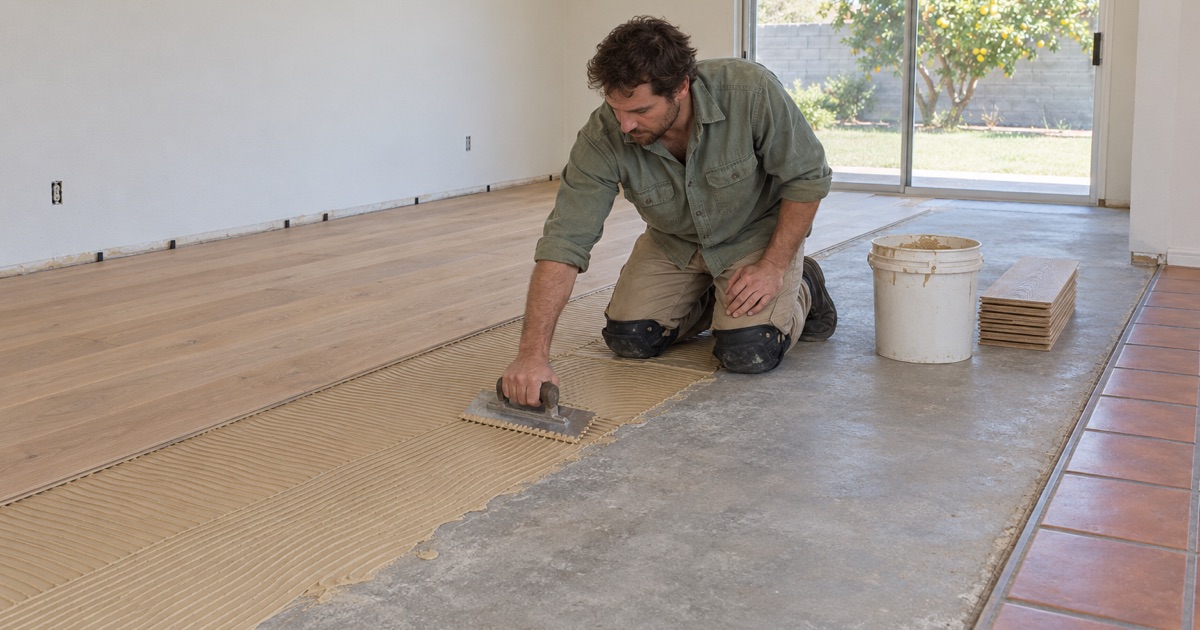
Gluing engineered boards directly to the slab gives the most solid feel underfoot and the least hollow sound. The adhesive, trowel notch and open time all come from the flooring manufacturer’s instructions, and we follow them board by board. We leave the required expansion gap at every wall and fixed object, then cover it with baseboard or shoe molding, so the floor has room to move with the seasons.
Floating Engineered Floors
Floating floors lock together at the edges and rest on an underlayment rather than being fastened down. They go in faster, can sit over some existing hard floors, and are easier to pull up later if a slab leak or repipe calls for access. The trade-off is a slightly softer, more hollow feel, which a good underlayment reduces, and a greater need for flat concrete underneath.
Planning Around Slab Leaks and Repipes
A slab leak under an engineered floor is a different repair depending on how the floor went in. Glue-down boards have to be cut out around the plumber’s access point and new ones woven in, while a floating floor can sometimes be unlocked row by row and relaid. Either way, we plan the access opening with the plumber before any board is cut, let the slab dry, recheck the moisture and patch with boards from the same product line, so a pipe repair does not turn into a new floor. Keeping a box of spare planks after installation makes that kind of repair far easier.
Condos, Upstairs Units and Sound Ratings
In a condo or upstairs unit, the new floor becomes the ceiling for someone below. Many associations require an acoustic underlayment that meets a minimum sound rating, often stated as a delta IIC rating, and some require approval of the product before installation. We read the association’s alteration rules and work hours first, choose an underlayment that meets them and help assemble the paperwork the board wants to see.
Our Step-by-Step Engineered Hardwood Flooring Process
Step 1: Measure, Test and Specify
We measure the rooms, test the slab or subfloor for moisture and check it for flatness, then walk you through wear layer, core and species options that suit what we found. The estimate lists each product’s specification and every preparation step as its own line.
Step 2: Remove and Prepare
Old flooring, tack strip and adhesive come up, suspect tile and mastic are tested first, and the substrate is ground, patched and flattened. Baseboards and door casings are adjusted or undercut so the new floor slides beneath them cleanly.
Step 3: Acclimate and Install
Boards sit in the conditioned house as the manufacturer requires, and we confirm their moisture content against the substrate before the first row goes down. Installation follows the product’s own instructions, with rows staggered and planks blended from several boxes so color and grain spread evenly.
Step 4: Trim, Transitions and Handover
Reducer strips, T-molding and stair nosings are fitted where the new floor meets other rooms and levels, and baseboard or shoe molding covers the expansion gap. We walk the floor with you, leave care instructions for the finish and note the date it can take heavy furniture.
- 20+ Years of Floor Work
- Written, Itemized Estimates
- Moisture Readings Recorded