
Westminster Wood Flooring handles water damaged hardwood floor repair in Westminster, CA, serving surrounding cities including Midway City, Garden Grove, Stanton, Fountain Valley and Huntington Beach. In 20+ years we have repaired floors soaked by dishwashers, refrigerator lines, water heaters, toilets, slab leaks and failed supply pipes, and nearly every one of those jobs started with the same question: where did the water go that nobody can see?
Water travels under a wood floor before it shows on top, so the damage is almost always bigger than the stain. We trace the leak to its source, map the moisture across the boards and the subfloor with a moisture meter, and document everything with photos and written readings an insurance adjuster can use. Only then do we decide what can be dried and saved and what has to be cut out.
You get a written, itemized estimate that separates drying, board replacement, subfloor repair and refinishing, so you and your adjuster can see each part of the job. Where a plumber has to open the floor to reach a pipe, we plan that opening together before a board is cut, which keeps a pipe repair from becoming a whole new floor.
What Water Does to a Wood Floor
Cupping While the Wood Is Wet
Wood swells as it absorbs water, and because the underside of a floor is usually wetter than the finished top, the bottom of each board swells more. The edges rise and the centers stay low, which is cupping. It is the most common first sign of a leak under a wood floor, and it is often reversible if the water is stopped and the floor dries evenly. The mistake is to sand it flat too soon, before the boards have finished drying and moving back toward their original shape.
Buckling and Boards Lifting Off the Subfloor
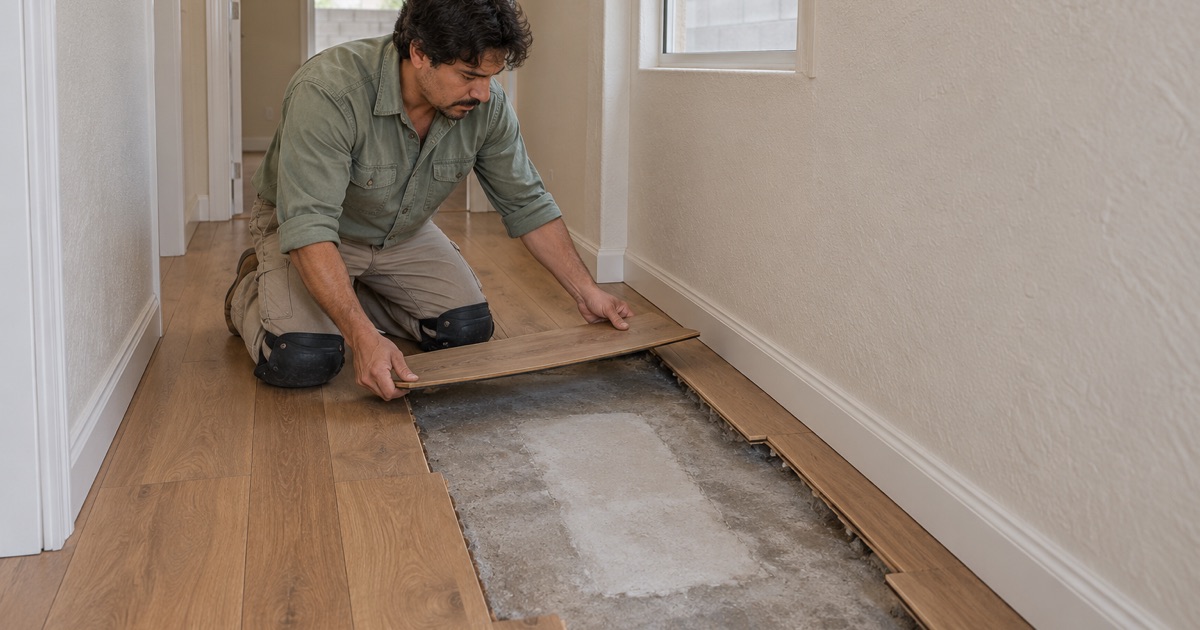
When the swelling is severe, boards run out of room at the walls and push against each other hard enough to lift off the subfloor, sometimes several inches. Buckling tears fasteners loose and often cracks tongues and grooves, so buckled boards rarely go back down cleanly. In most cases the lifted section is removed, the subfloor is dried and checked, and new or salvaged boards are woven in once the moisture readings are back in range.
Stains, Delamination and Mold Risk
Water that sits on oak reacts with tannins in the wood and leaves dark gray or black stains, which usually go too deep to sand out. Engineered boards can delaminate as the wear layer separates from a swollen core. Under the floor, damp sheathing that stays wet for days can support mold growth. Each of these changes the repair from drying and refinishing to replacement, which is why we look at the underside of the floor, not just the surface.
Finding and Measuring the Water
Tracing the Leak to Its Source
We follow the moisture back to where it started: an appliance line, a supply valve, a toilet seal, a water heater, a shower pan or a pipe in the slab. Stopping the source comes first, and plumbing repairs go to a licensed plumber. Knowing the source also shapes the claim, since an adjuster needs to know what failed and when it was discovered, and it decides whether the floor can dry in place or needs to be opened.
Mapping Moisture Across the Floor
A wood moisture meter reading at one spot says little. We take readings in a grid across the affected area and into dry rooms nearby, which gives a baseline for what normal looks like in that house. The resulting map shows how far the water traveled under the boards, often well beyond the visible stain, and it becomes the record we compare against each day as the floor dries.
Slab Leaks Under Wood Floors
On a concrete slab, water from a leaking line can rise through the concrete and into the floor from below. A warm spot underfoot can be the first sign on a hot-water line. Once leak detection and the plumber have located the leak, we remove only the boards needed for access, protect the rest of the floor during the repair, and retest the slab after it has dried before any flooring goes back down.
Our Step-by-Step Water Damaged Hardwood Floor Repair Process
Step 1: Document Before Anything Moves
Before a board is lifted, we photograph the floor, record the moisture map and note the source of the water and the date it was found. That record is what an adjuster needs to evaluate the claim, and it protects you if the extent of the damage is questioned later.
Step 2: Dry the Floor and the Subfloor
Drying a wood floor takes air movement and dehumidification, and sometimes removing a few boards to let the subfloor breathe. We track moisture readings each visit until they settle near the baseline from the dry rooms. Rushing this step is how a repaired floor cups or gaps again months later.
Step 3: Remove What Cannot Be Saved
Boards that are buckled, blackened, split or delaminated are cut out without damaging their neighbors. The subfloor underneath is inspected, and any water-swollen or soft sheathing is cut back and replaced with new plywood fastened to the joists.
Step 4: Weave In Matching Boards
Replacement boards are matched by species, width, thickness and finish, including discontinued flooring sourced or milled to fit. They are woven in with staggered end joints, so the repair follows the pattern of the existing floor rather than showing a square outline.
Step 5: Sand, Finish and Hand Over the Paperwork
Once the whole area reads dry, the floor is sanded and finished so the repair blends with the rest of the room, using finishes within the South Coast basin’s 275 g/L wood-coating limit. You get the final photos, readings and an itemized invoice for your records or your claim, plus a written cure schedule for the refinished rooms.
Insurance Claims, Rentals and Condos
Working With Your Insurance Adjuster
An adjuster evaluating a floor claim wants to know the cause of the water, the extent of the damage and the cost of a proper repair. Our photos, moisture maps and itemized estimate answer those questions in the form adjusters are used to reading. Coverage decisions stay between you and your insurer, but clear documentation helps the claim move and supports a repair that restores the floor rather than patching around it.
Rental Units and Security Deposits
When a leak damages the floor in a rental, the cause matters to both landlord and tenant. A plumbing failure is a repair; damage from a tenant’s own neglect may be something else. Our documentation records what we found without taking a side, and our itemized estimates separate water damage from normal wear and tear, which is the line California Civil Code 1950.5 draws for security deposit deductions.
Leaks Between Condo Units
In a condo, water often comes from the unit above, and the repair can involve the association, two owners and more than one insurance policy. Many associations also require approval and a specific acoustic underlayment before a floor is replaced. We read the association’s rules, document the damage on both sides of the ceiling where we have access, and plan the repair so it meets the board’s requirements the first time.
- 20+ Years of Floor Work
- Written, Itemized Estimates
- Moisture Readings Recorded